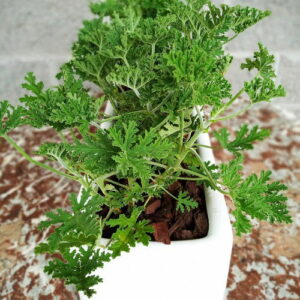
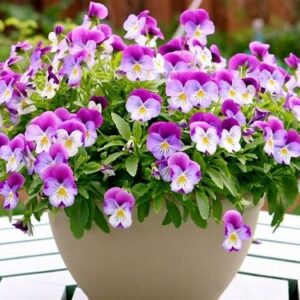
Designing a colorful pot
Creating a planter is a great way to bring greenery and color into any space, whether it’s indoors, on a patio, or in a garden. Preparing a planter involves choosing the right materials, planning a suitable layout, and ensuring the plants have optimal conditions to thrive. Here’s a step-by-step guide to preparing your planter.
1. Choose the Right Planter
The first step is to select a container suitable for the plants you want to grow. Here’s what to consider:
- Material: Planters come in various materials like ceramic, terracotta, plastic, metal, or wood. Each material has pros and cons—terracotta is breathable but can dry out quickly, while plastic retains moisture better.
- Size: The size of the planter will determine the number and type of plants. Make sure the planter is deep enough to support the roots of the plants you plan to use.
- Drainage: Proper drainage is essential to prevent water from accumulating and potentially causing root rot. Choose a planter with drainage holes or add them if possible.
2. Select a Potting Mix
Using the right potting mix can make a big difference in plant health:
- Quality Potting Soil: Use a potting mix rather than garden soil, as it’s lighter, drains well, and often contains essential nutrients.
- Soil Amendments: Some plants, like succulents or cacti, require a well-draining mix with sand or perlite. For plants that need moisture, add ingredients like vermiculite or coconut coir.
3. Plan the Layout and Plant Types
Consider the growing requirements and aesthetics of the plants you want to include:
- Sunlight Needs: Group plants with similar light requirements together. Some planters can be moved if they need different lighting at different times of the year.
- Watering Needs: Try to match plants that have similar water requirements. For example, succulents and drought-tolerant plants should go together, while water-loving plants can share space.
- Arrangement: For a visually appealing planter, arrange plants of different heights and textures. Place taller plants in the center or the back, medium plants around them, and trailing plants along the edges.
4. Layer the Planter
Creating layers in the planter helps in drainage and soil retention:
- Drainage Layer: Add a layer of pebbles or broken pottery pieces at the bottom. This helps prevent water from pooling and encourages proper drainage.
- Soil Layer: Fill about ⅔ of the planter with potting mix, leaving enough space to add your plants.
- Top Layer: After placing the plants, cover the soil surface with a decorative layer, such as moss, rocks, or mulch. This helps retain moisture and gives the planter a finished look.
5. Plant Your Plants
Carefully remove the plants from their pots, being cautious with the roots. Place them in the prepared planter, starting with the largest plants and working your way to the smallest. Gently fill in the gaps around the roots with soil, and press down lightly to ensure stability.
6. Water and Place the Planter
Once all the plants are arranged and the soil is filled, water the planter gently until water starts to drain out from the bottom. This first watering settles the soil around the roots and removes air pockets.
- Placement: Find a suitable location based on the light and temperature needs of your plants. Indoor planters may thrive near windows, while outdoor planters should be positioned in a spot that meets their light requirements.


